Simply Simple Boule... uh, Bread!
Prep time
Cook time
Total time
Begin this dough in the evening and it will be ready to bake the next day. It's very forgiving, so you can plan a 12 - 18 hour proofing period for the first rise in order to fit it into your daily schedule.
Author: Toni
Recipe type: Breads
Ingredients
- 2 Cups Tap Water
- ½ Teaspoon Instant Yeast
- 4 - 4½ Cups Bread Flour
- 2 Teaspoons Salt
Instructions
- Add tap water and yeast to a large mixing bowl. Add 4 cups of the flour to the bowl, then sprinkle the salt on top of the flour before stirring everything together.
- The dough will be very sticky. If it's too loose and looks more like batter than a sticky dough, add the extra ½ cup of flour, then stir again.
- Scrape down the sides of the bowl, then cover with plastic wrap and set in a warm place overnight.
- The next morning, turn the dough out onto a lightly floured surface. This is where you will create a nice "skin" on the outer surface of the dough.
- Using floured hands, gently cup them around the back of the dough blob. Now pull the dough towards you across about 10" of the counter.
- Set the dough back onto the floured area of the counter, cup your hands at the back and repeat the gentle pulling motion twice more.
- You will see a taut skin forming on the surface of the dough. You can do the pulling motion up to 5 times, but stop as soon as you see it getting taut. That means it's done and ready for the final proof!
- Place the ball of dough onto a well floured tea towel, or into a well floured banneton, then cover loosely with plastic wrap,
- If you will be baking your bread in the morning, let the dough proof for one hour, then proceed with the baking process.
- If you will be baking your bread that evening, place the banetton or tea towel into a bowl, cover with plastic wrap and set it into the fridge. In the evening, remove the dough from the fridge, then proceed with the baking instructions.
- To Bake:
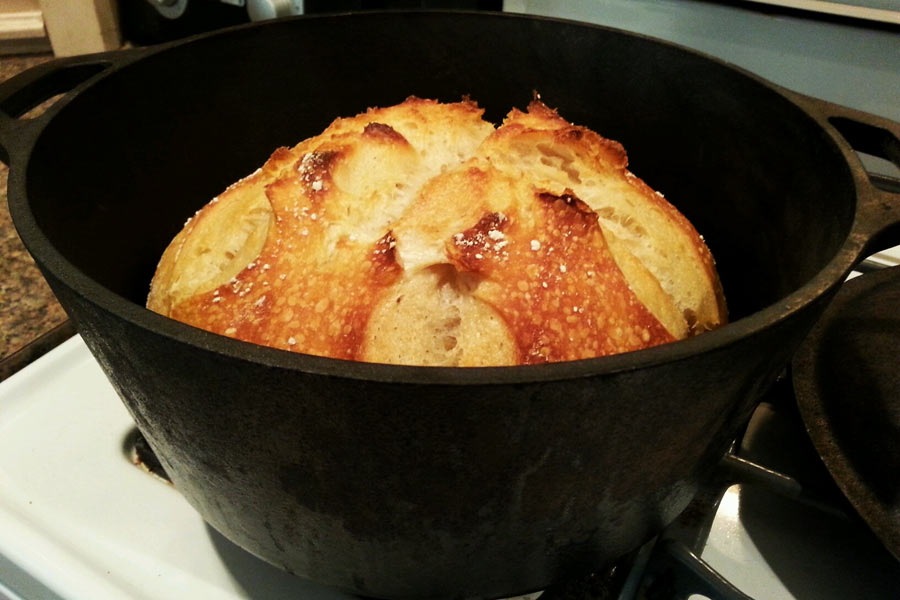
- Place a covered, oven proof dutch oven on the middle rack of the oven.
- Preheat the oven to 450F for 30 minutes to allow the dutch oven to get to temperature.
- After 30 minutes, remove the dutch oven and carefully remove the lid. Working quickly, dump the dough into the pot as gently as possible. You can slash the top at this point if you wish.
- Replace the lid and place the dutch oven back into the oven.
- Turn the heat down to 430F. Cook for 30 minutes, then remove the top, turn the heat to 425F and continue baking for another 15 minutes.
- Carefully turn the boule out onto a baking rack, then allow it to cool for at least 30 minutes before slicing. The bread continues to cook as it cools!
Notes
About the flour you use:
A high protein content flour is important with this recipe as it allows the dough to create long gluten strands during the overnight proofing. King Arthur Bread Flour is excellent for this bread.
The amount of flour you will need to use to create a soft, sticky dough will depend upon how you scoop your flour. Each person has their own method which can result in wide variances in the actual amount of flour contained in "one cup". With practice you'll quickly learn by sight when your dough has the proper proportion of flour to water to create the perfect boule.
Recipe by Dang Good Cookin' at https://danggoodcooking.com/simply-simple-boule-uh-bread/